How to Buy Custom Roll-Out Mats with Your Own Logo: A Step-by-Step Guide
Introduction
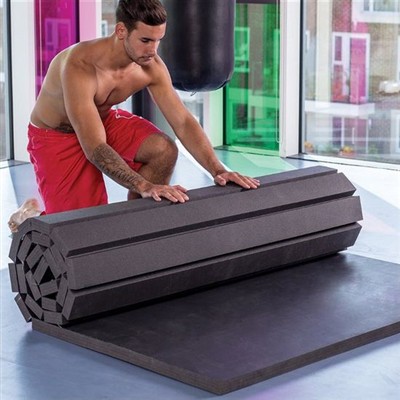
Custom roll-out mats with printed logos are increasingly popular among martial arts gyms, sports clubs, and event organizers. A branded mat not only improves the professional appearance of a training space but also strengthens brand identity during training sessions, competitions, and promotional events.
This guide explains the complete process of purchasing custom roll-out mats with your own logo - from defining technical requirements to final production - helping buyers avoid common mistakes and ensure a smooth ordering experience.
1. Step One: Confirm the Training Area Size
The first and most important step when buying custom roll-out mats is to clearly define the size of the training area.
Key questions to consider:
What is the total floor area (length × width)?
Is the mat intended to cover a full dojo, competition zone, or temporary event space?
Will the mat be used alone or combined with other flooring systems?
Roll-out mats are typically produced in standard widths with customizable lengths. Knowing the exact area helps determine:
Number of mat rolls required
Optimal roll length for easy installation
Seam placement and layout design
Accurate measurements reduce material waste and ensure a clean final appearance.
2. Step Two: Choose the Right Thickness
Once the area size is confirmed, the next step is selecting the appropriate thickness.
Thickness should match:
Martial art discipline
Training intensity
Athlete weight and skill level
Common thickness options include:
20–25 mm: Suitable for striking-based martial arts and light training
30 mm: Ideal for mixed-use gyms and daily training
40 mm: Recommended for grappling, BJJ, and wrestling
40 mm and above: Preferred for high-impact applications
For custom roll-out mats, thickness also affects:
Roll weight
Transportation cost
Ease of handling during setup
Balancing safety and practicality is essential.
3. Step Three: Select the Proper Foam Density
Thickness alone does not determine performance. Foam density plays a critical role in durability, shock absorption, and long-term stability.
When choosing density, consider:
Frequency of daily use
Number of trainees per session
Expected service life
Higher-density foam:
Provides better support
Maintains shape over time
Performs well under heavy load
Lower-density foam:
Feels softer
Suitable for light or occasional use
For commercial gyms and competitions, medium to high density is generally recommended to ensure consistent performance and longer lifespan.
4. Step Four: Confirm Logo Design and Placement
After technical specifications are finalized, the next step is logo customization.
Important logo details include:
Logo artwork file (AI, PDF, or high-resolution image)
Logo size and proportion
Printing position (center, corner, multiple logos)
Single-color or multi-color printing
Logo placement should consider:
Visibility during training and competitions
Camera angles for events or live streaming
Alignment with mat seams
Professional manufacturers support various logo printing methods, ensuring clear, durable results that resist wear and fading.
5. Step Five: Review Design Mockups
Before production begins, buyers should always request a digital design mockup.
A design mockup typically shows:
Overall mat layout
Exact logo size and placement
Color combinations
Edge alignment
This step ensures that all details match expectations and allows adjustments before manufacturing. Confirming the design in advance prevents costly revisions later.
6. Step Six: Communicate Details with the Sales Team
Clear communication with the supplier's sales team is essential for a successful custom order.
Information to confirm includes:
Final dimensions and thickness
Foam density specification
Logo artwork and printing method
Quantity and packaging requirements
Delivery timeline
An experienced sales team will review the specifications, provide technical advice, and help optimize the design for production efficiency.
7. Production Confirmation and Deposit
Once all details are confirmed and the design mockup is approved, production can begin.
Standard process includes:
Design confirmation
Deposit payment
Material preparation
Logo printing and lamination
Quality inspection
Paying a deposit secures production scheduling and raw materials, ensuring on-time delivery.
8. Packaging and Delivery Considerations
Custom roll-out mats are usually packaged to protect:
Printed surfaces
Edges and corners
Foam structure during transport
Packaging options can be adjusted based on:
Export requirements
Storage conditions
Customer handling preferences
Proper packaging helps maintain mat quality from factory to final destination.
9. Common Mistakes to Avoid
When ordering custom roll-out mats, buyers should avoid:
Skipping area measurement confirmation
Choosing thickness without considering density
Providing low-resolution logo files
Skipping design mockup approval
Attention to detail ensures a smooth production process and a professional final product.
10. Conclusion
Buying custom roll-out mats with your own logo is a straightforward process when approached step by step. By confirming area size, thickness, density, and logo details in advance, buyers can achieve a high-quality, branded flooring solution that meets both functional and visual requirements.
As a China-based factory with over 20 years of manufacturing experience, we support full customization for roll-out mats, including various logo printing options. Our sales team provides design mockups, technical guidance, and stable production to help gyms and distributors worldwide build professional training spaces.